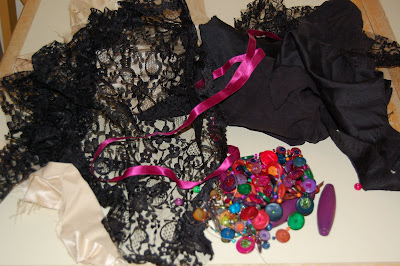
So today I made a statement necklace using some scraps of fabric, including lace, a neutral sort of satin fabric and a black suedette, plus some ribbon that I had left over from another project and a some broken necklaces.
You can repeat this project using all sorts of scraps of fabric, beads, flowers, bows, pieces of leather or leather shoe laces, broken costume jewellery to make your own unique statement necklace.
 Here is how to do it:-
 Draw five (or more) random shapes on a piece of paper and cut them out.
 Use three layers of fabric. The lace in the middle with the background fabric on one side and a backing fabric on the other side. If your fabric is really creased like mine was now is a good time to iron it. Pin your shapes on the three layers of fabric.
 Cut around the shapes leaving about 1/2 cm of seam allowance around the edge of each shape. Sew around the edge of the paper shape to join the three layers but leave a gap of at least a few centimetres. It would probably be quickest to do this with a sewing machine but I just did a quick running stitch by hand as I couldn't be bothered to unearth my sewing machine.
 Turn the shapes inside out through the gap that you have left in the sewing so that the lace shows with the backround fabric behind it. Use a pen, knitting needle or something similar to push out the edges of the shape. Fold in the fabric at the gap you have just turned it through and sew it with tiny stitches.
 Repeat this for each of the shapes, then press them flat.
 Now comes the creative bit... Decide how you will join your shapes together add a fastening and embellish the necklace. I just sewed the shapes together, used a broken necklace for the fastenings, made a rosette from the ribbon by gathering it with a running stitch and winding around in a circle, then stitching. I also added a bit of chain with a bead at the bottom of the necklace.
 Have a play around to see what looks best before sewing anything in place. You could use ribbons for the fastening or even leather shoe lace, you could join the shapes together using little bits of ribbon and embellish with individual beads or strings of beads, chains from broken necklaces, fabric flowers etc.


No comments:
Post a Comment